
A great number of users are habitual to search for their necessities but need to purchase them later. To let them create a list of their desired items, wish-lists are used by most of the eCommerce websites. It gives them the opportunity to bookmark the products right in their user accounts and proceed to checkout it whenever they need them. Furthermore, they can share wish-lists with their loved ones to have those products in gifts. The major benefit of wish-lists is to keep your customers engaged in your store and remind about their favorite products.
If you are managing your WooCommerce website and need to enhance the shopping experience with a friendly wish-list, you either have to create a code or install a plugin. Coding will require you hire a programming expert, whereas a plugin is a quick procedure to add functionality to your web-shop. To help your customers easily create and manage wish-lists, we recommend WooCommerce Wishlist Plugin by FME. A quick installation and minor configuration settings add entire mechanism for adding products to wishlists. Following is a simple guide to install and use wish-list with the help of the above-mentioned plugin.
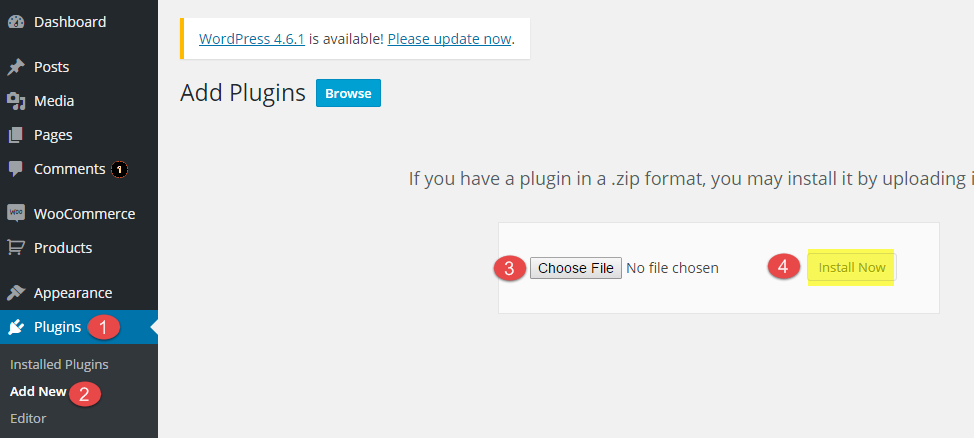
Step 1: Download WooCommerce Wishlist plugin.
Step 2: Upload the files to the Add New section in the Plugins tab and continue with the installation of the extension.
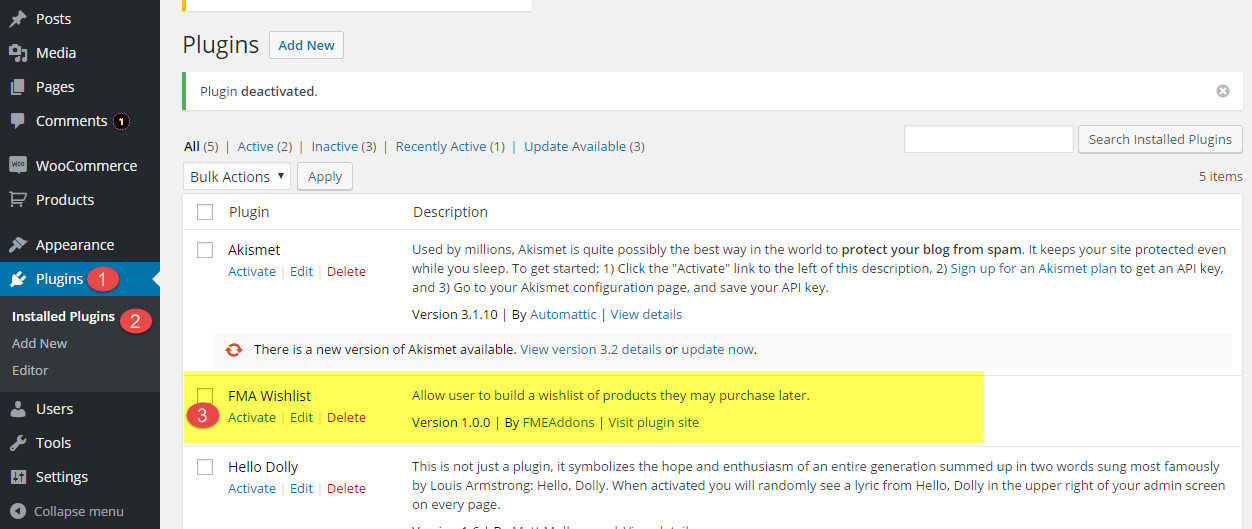
 Step 3: Active the plugin once it is installed. Click on the installed plugin and click activate.
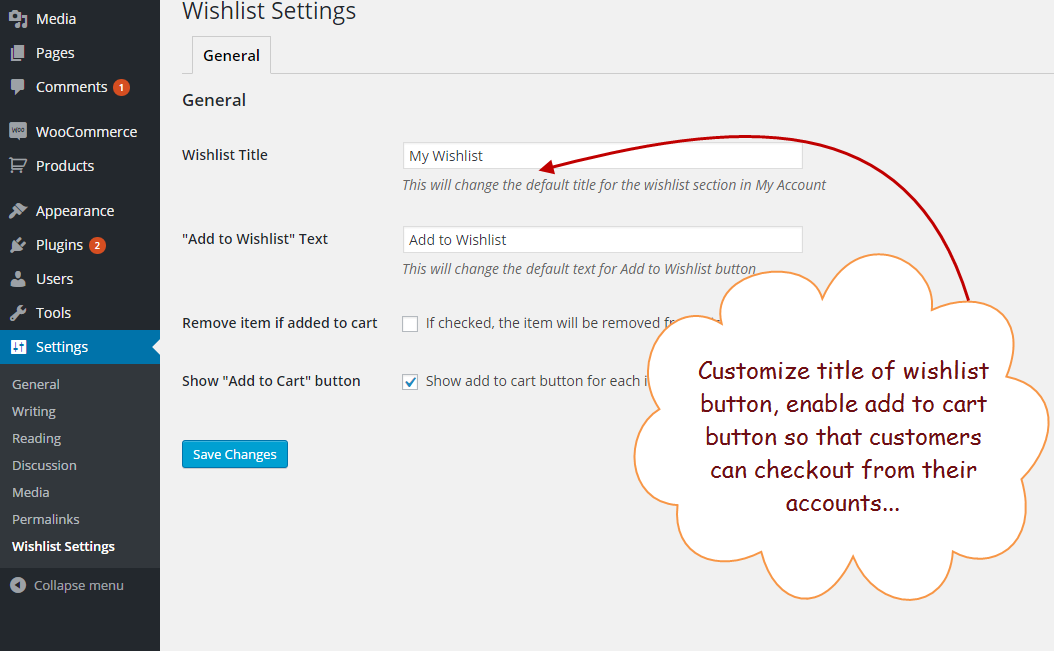
 Step 4: The activation will result in an additional tab in settings option. Navigate to the Wishlist settings and do necessary changes. You can customize the titles and configure other options as well.
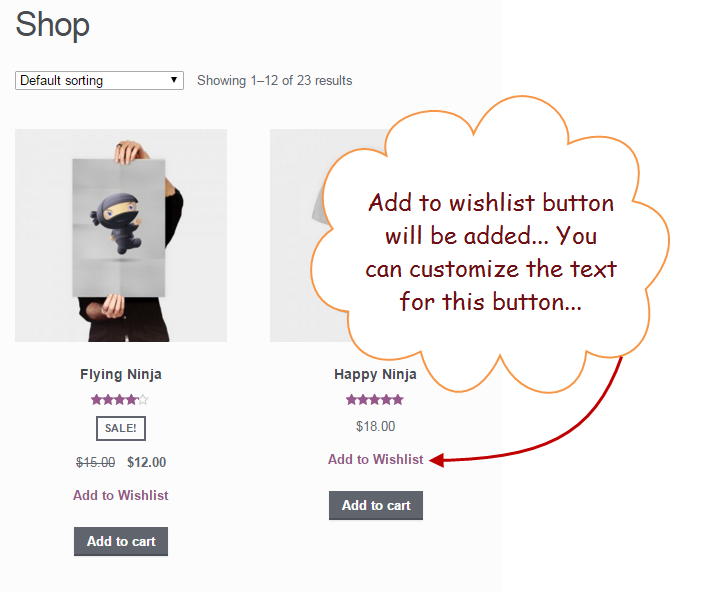
 Step 5: Once the basic configuration setting is complete, the plugin will start to display an additional button of ‘Add to Wishlist' on products so that customers can keep add their favorite store items to a list and buy whenever they feel comfortable.
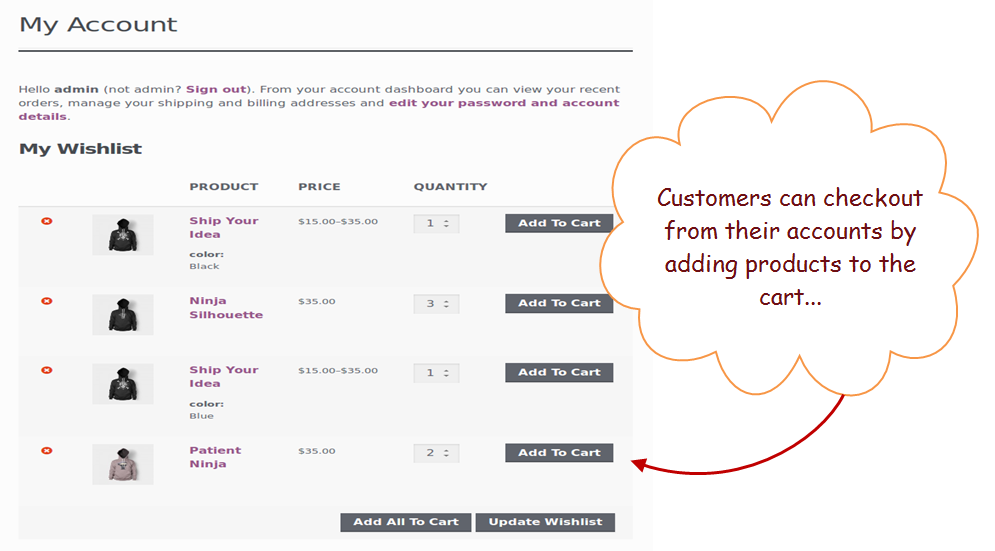
 Step 6: Customers can view the number of items they have added to the wish list from their user accounts. It gives them a quick reminder of their required products and can check out right from the wish list.
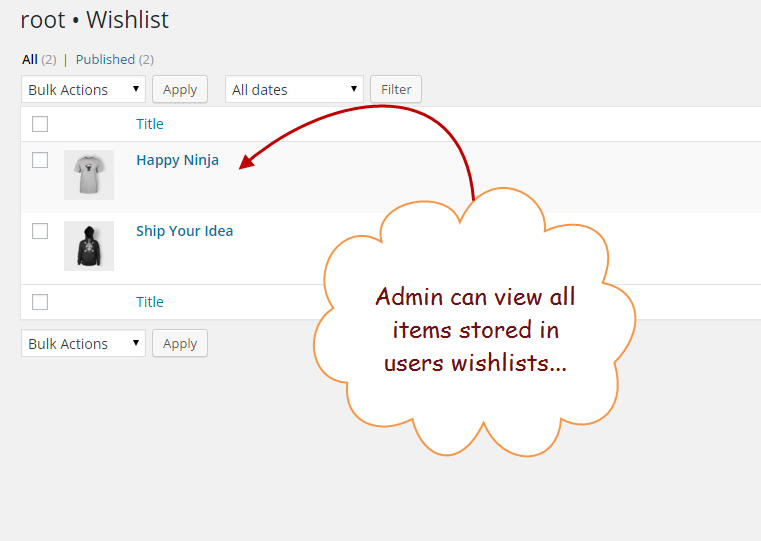
 Step 7: In addition to customers, the admin also has the access to review wish list of any specific or all users.
 Step 8: by clicking wish list of a user, an admin can review the entire list of the products that a customer is interested in. website admin has the right to edit or send an item to trash as per the companies policies.
Step 3: Active the plugin once it is installed. Click on the installed plugin and click activate.
Step 4: The activation will result in an additional tab in settings option. Navigate to the Wishlist settings and do necessary changes. You can customize the titles and configure other options as well.
Step 5: Once the basic configuration setting is complete, the plugin will start to display an additional button of ‘Add to Wishlist' on products so that customers can keep add their favorite store items to a list and buy whenever they feel comfortable.
Step 6: Customers can view the number of items they have added to the wish list from their user accounts. It gives them a quick reminder of their required products and can check out right from the wish list.
Step 7: In addition to customers, the admin also has the access to review wish list of any specific or all users.
Step 8: by clicking wish list of a user, an admin can review the entire list of the products that a customer is interested in. website admin has the right to edit or send an item to trash as per the companies policies.
ImportantTo explore this topic deeper watch this video tutorial which covers all the features of WooCommerce Wishlist Plugin from downloading to its usage.
WooCommerce Wishlist Plugin Demo Video