The reason of an increase in online shopping is the ultimate comfort that every user enjoys in searching for products and services. The search engines are winning the game for guiding internet users to the stores that best matches their search query.
Reaching a reliable online store is not their final destination, as most of the buyers are inclined to shop products from the famous brands and manufacturers. A small store that mainly deals in a few product lines are quite easy to explore, but the online mega-malls have racked thousands of products that are from different manufacturers.
To help customers browse products with respect to brands, merchants can add a WooCommerce Brands plugin to their website. It allows merchants to easily add a dedicated page and display brands in an alphabetical list. Some of the brands can be added with featured thumbnails for the convenience of customers. By following this simple step-by-step guide, you can easily allow customers to shop by brand.
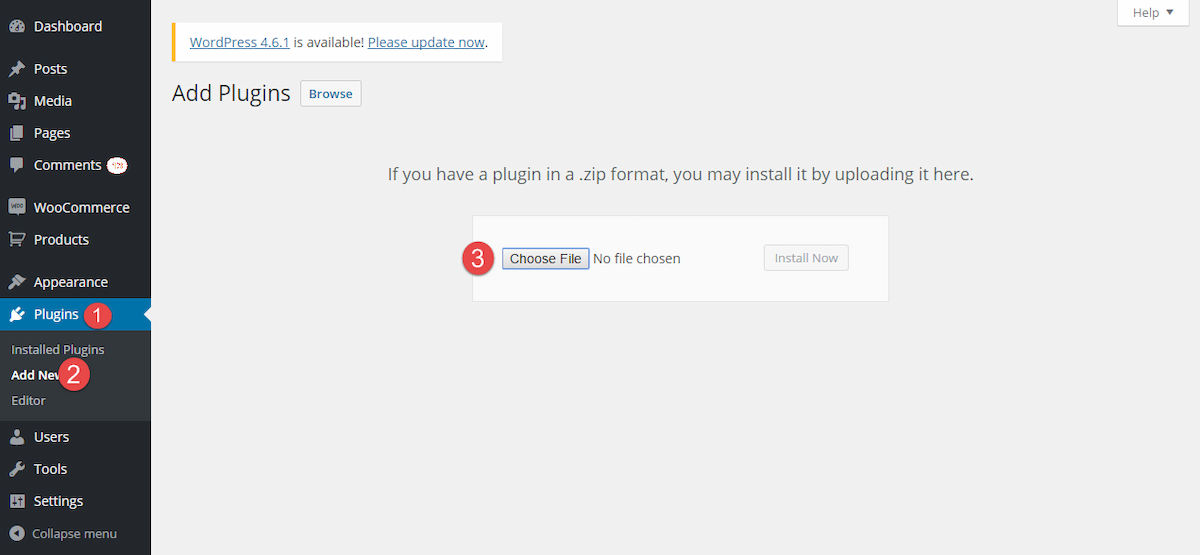
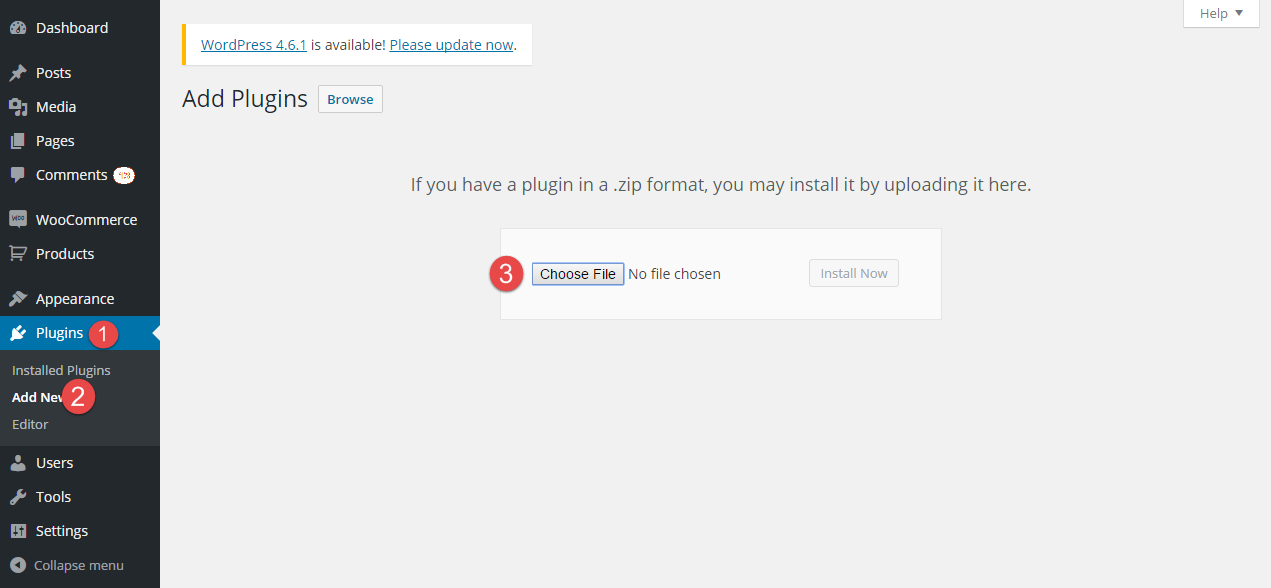
Step 1: Download WooCommerce Brands plugin.
Step 2: Install the extension by adding the files to the ‘Plugins’ section.
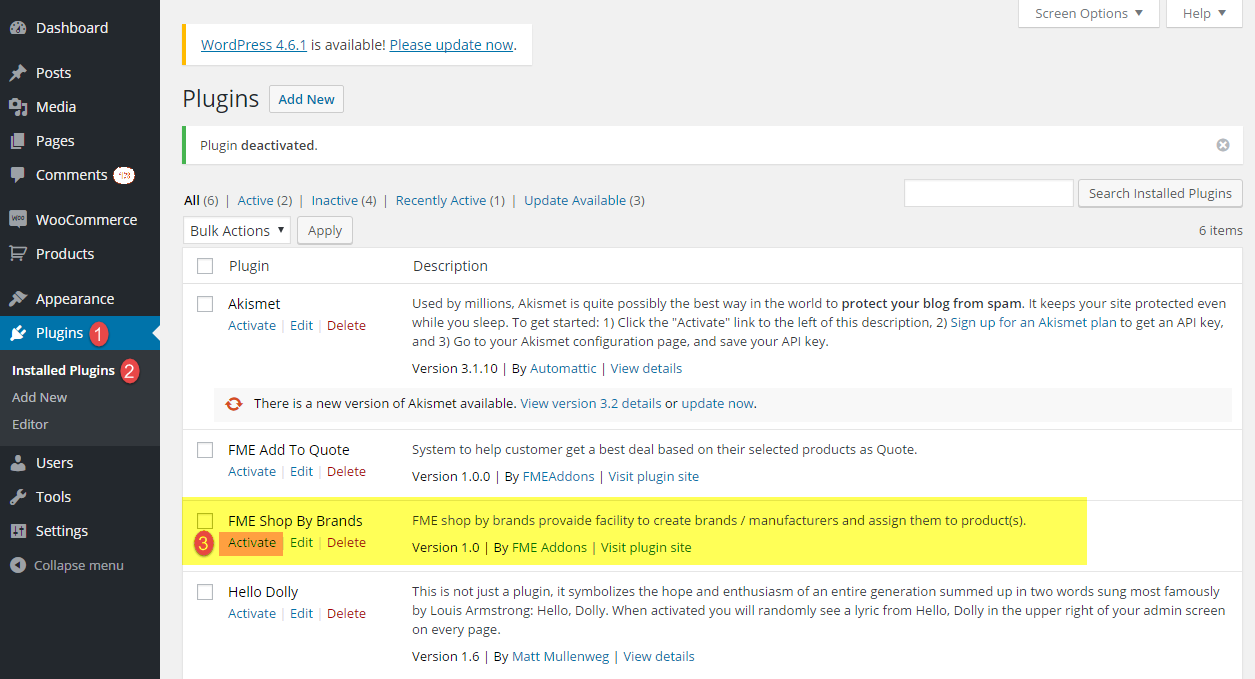
 Step 3: Click the ‘Installed plugins’ tab and activate the extension just installed.
 Step 4: The activation will add a new tab to the products menu labeled as Shop by Brand. Here, you can add new bands and edit, review, delete the already created ones.
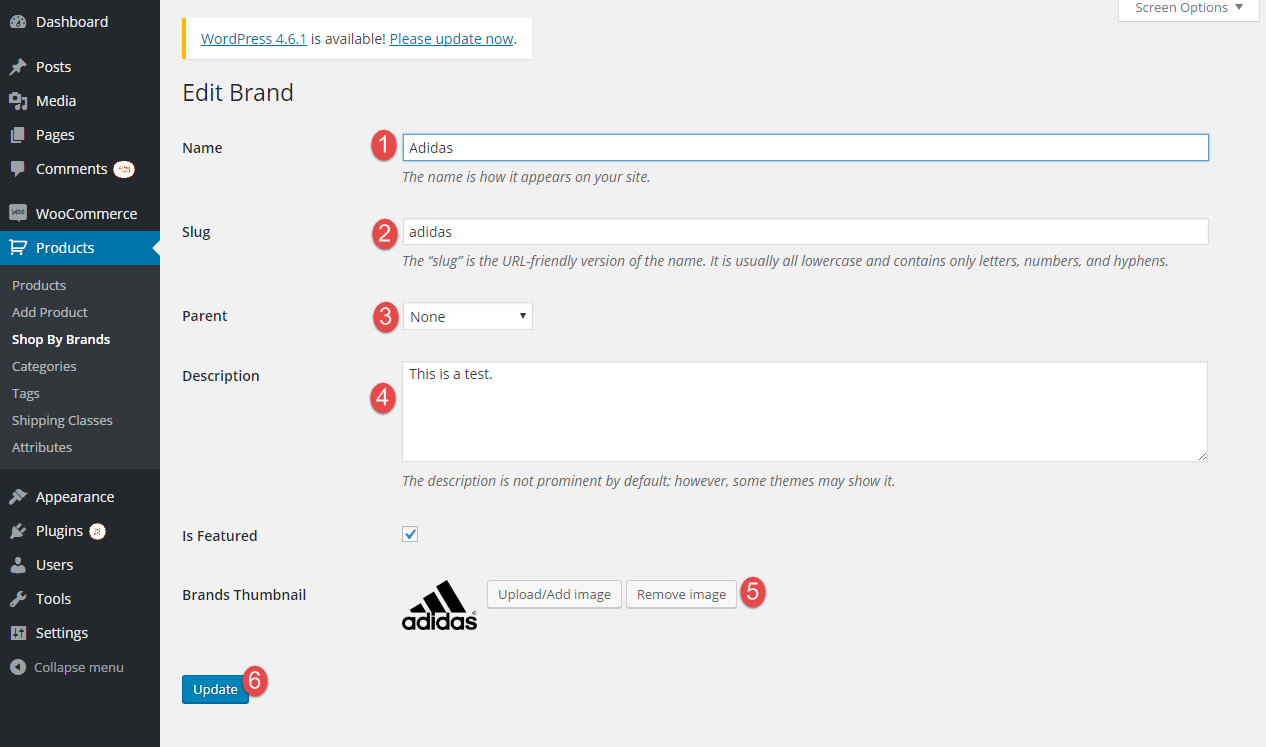
 Step 5: To add or edit brands, you will have to add the details that include name, slug, parent brand, description, brand logo and the adding it to a featured listing.
 Step 6: Configure settings according to your business specific needs. You can enable the display of brands on products and catalog pages as well.
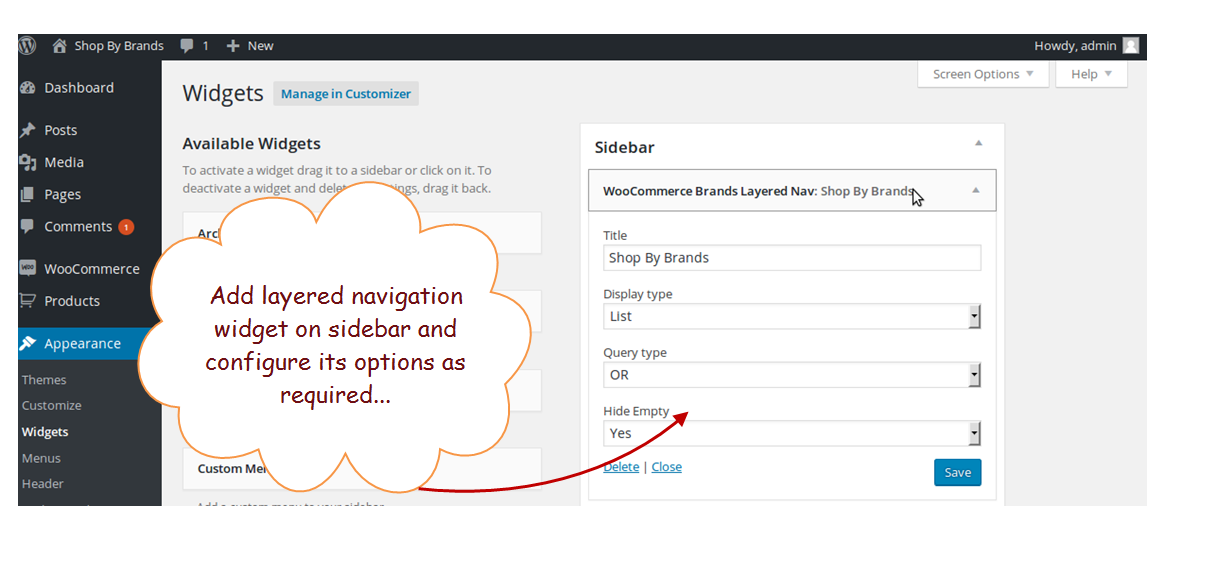
 Step 7: Now, move to the appearance tab, to add and configure sidebars for the display of brands. In the available widgets, you can easily find the ones that are provided with Shop by Brands plugin. add a layered navigation bar and select different options as per your preferences.
 Step 8: While staying on the same page, you can quickly add widgets to show brand thumbnails.
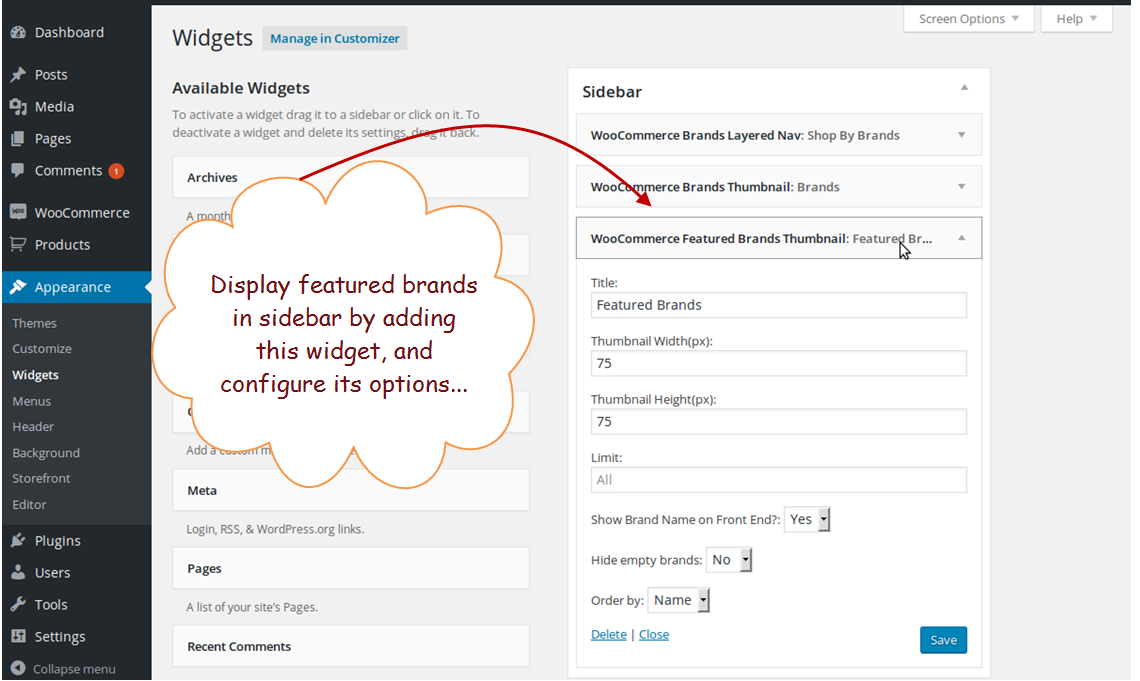
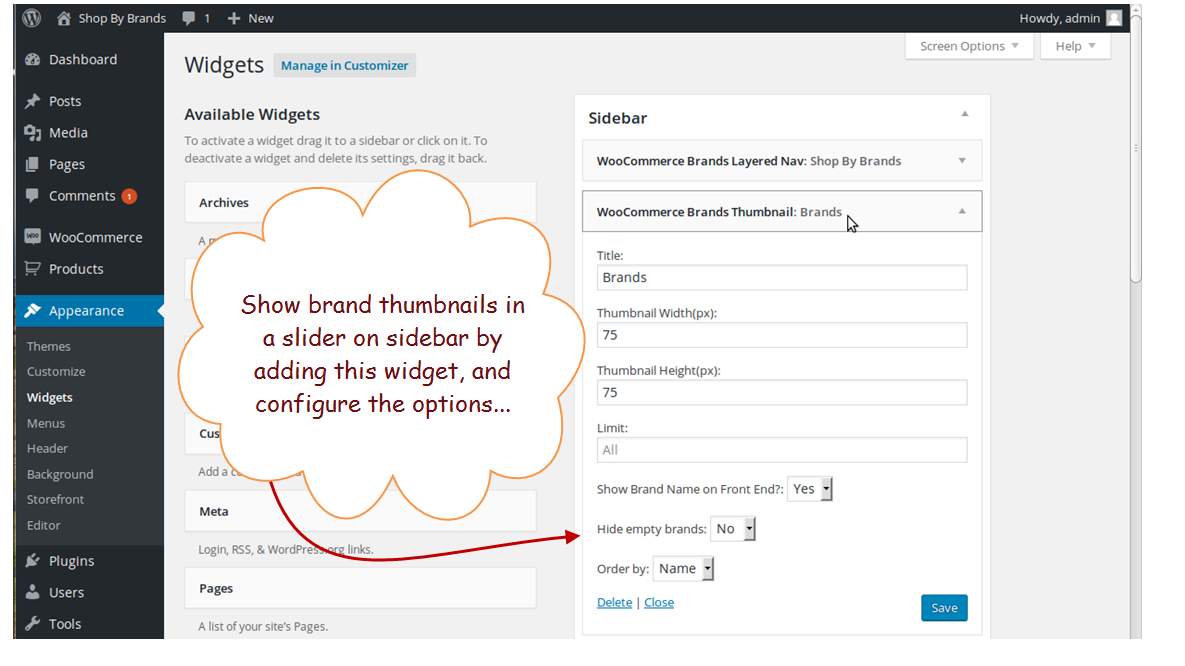 A widget for featured brand thumbnails can also be added in the same menu.
 Step 9: Now, to display the brands on any specific page, you can go to that page and paste the given codes. To configure the addition of these codes, you can confirm the addition of a new page with name Brands Short Codes. You can copy the code to any other page and enable the display of brands there.
 Step 10: The addition of code with display the brands in this way.
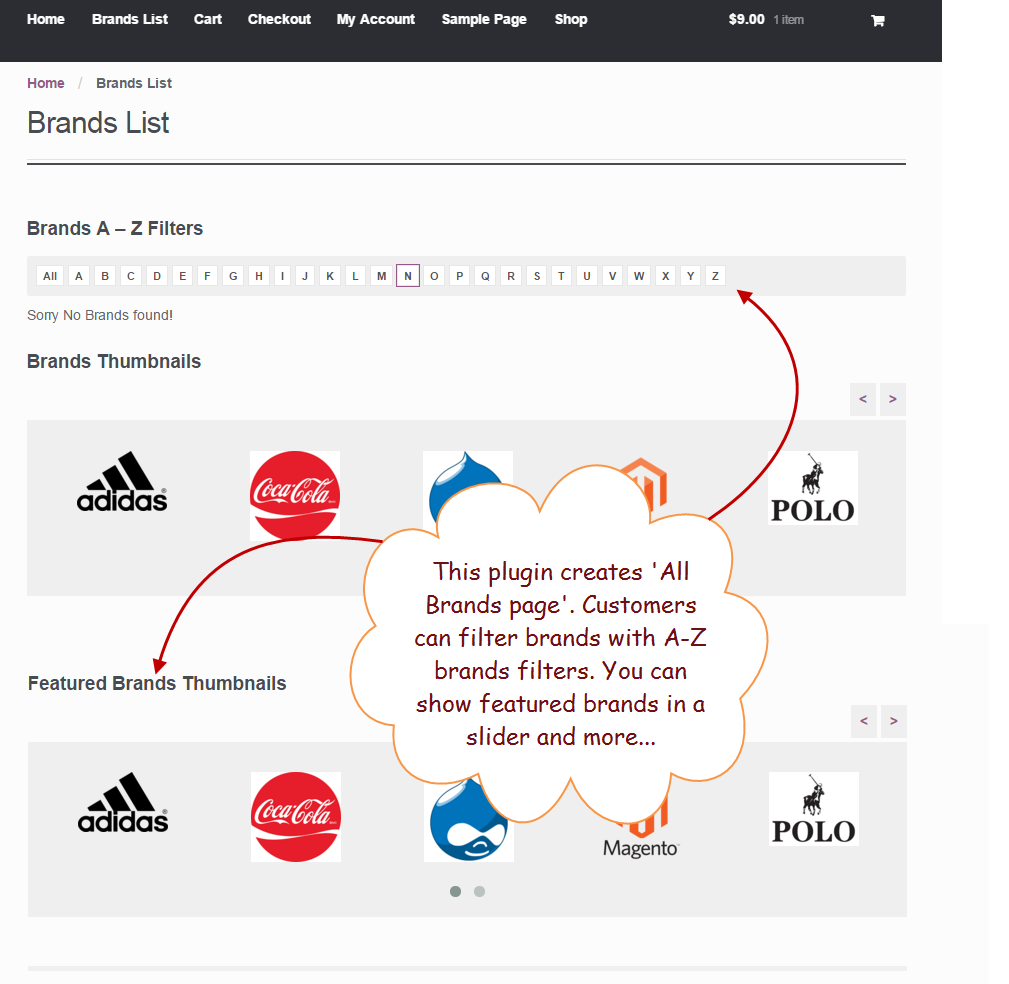 Step 11: By clicking each icon or thumbnail, they can access to all the products that are classified in that specific brand.
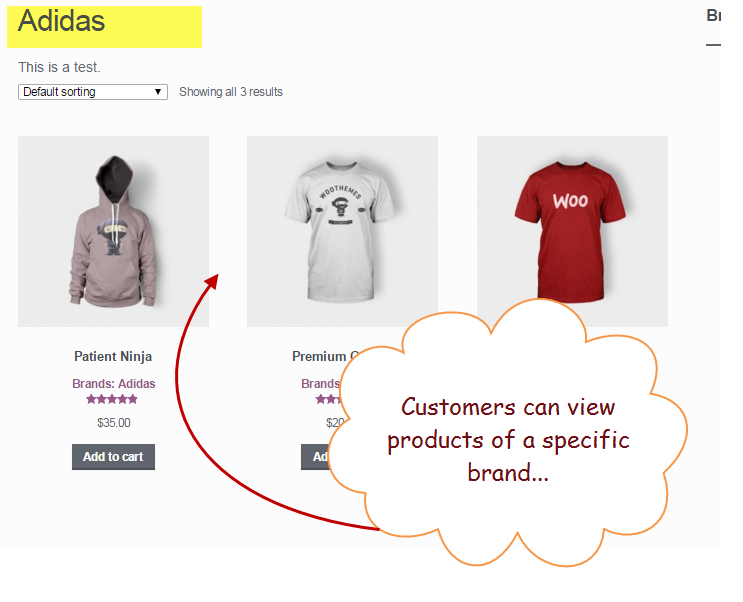 Step 12: Customers can either continue browsing the store with the predetermined category structure or simply jump to a brand classification. Each product displays the labels and brands it belongs to.
 The quality conscious customers always prefer to review the manufacturer of a brand before placing an order. Whether you are dealing in electronics, cosmetics, jewelry or garments, you can always get to know about the brand it carries. People often accept new brands with unknown manufacturers in the retail shops next to their home or office, but they become more selective in placing orders on an eCommerce website. To gain customers trust and loyalty, you can install the above-mentioned extension without hiring a professional developer.
Step 3: Click the ‘Installed plugins’ tab and activate the extension just installed.
Step 4: The activation will add a new tab to the products menu labeled as Shop by Brand. Here, you can add new bands and edit, review, delete the already created ones.
Step 5: To add or edit brands, you will have to add the details that include name, slug, parent brand, description, brand logo and the adding it to a featured listing.
Step 6: Configure settings according to your business specific needs. You can enable the display of brands on products and catalog pages as well.
Step 7: Now, move to the appearance tab, to add and configure sidebars for the display of brands. In the available widgets, you can easily find the ones that are provided with Shop by Brands plugin. add a layered navigation bar and select different options as per your preferences.
Step 8: While staying on the same page, you can quickly add widgets to show brand thumbnails.
A widget for featured brand thumbnails can also be added in the same menu.
Step 9: Now, to display the brands on any specific page, you can go to that page and paste the given codes. To configure the addition of these codes, you can confirm the addition of a new page with name Brands Short Codes. You can copy the code to any other page and enable the display of brands there.
Step 10: The addition of code with display the brands in this way.
Step 11: By clicking each icon or thumbnail, they can access to all the products that are classified in that specific brand.
Step 12: Customers can either continue browsing the store with the predetermined category structure or simply jump to a brand classification. Each product displays the labels and brands it belongs to.
The quality conscious customers always prefer to review the manufacturer of a brand before placing an order. Whether you are dealing in electronics, cosmetics, jewelry or garments, you can always get to know about the brand it carries. People often accept new brands with unknown manufacturers in the retail shops next to their home or office, but they become more selective in placing orders on an eCommerce website. To gain customers trust and loyalty, you can install the above-mentioned extension without hiring a professional developer.