Creating events on an eCommerce website is one of the effective strategies to engage users and let them place orders for tickets and passes. Conducting events is not limited to a service industry, as a typical brick and mortar store can also hold an event that is specific to a season, occasion or any other celebration.
Unfortunately, WooCommerce does not offer the facility to create events on your store and sell tickets alongside. To get the functionality, you either have to ask a developer to write a code or go for a relevant plugin. Hiring a developer, making him understand your requirements, negotiating the price and then waiting for the code to add into your website is a long journey. We have cut the process short for you by offering a fully functional plugin named as Events Manager. This is the perfect tool for increasing customers reach and making them pay for the tickets to secure a place in the upcoming events.
To help you easily add an interactive tool for managing events, we have drafted this tutorial. All it requires from you is to download, install and configure the application, and a well-equipped Events Manager will be in your control panel to add events and increase revenue. Follow the steps and do all the integration yourself without asking an expert for any help.
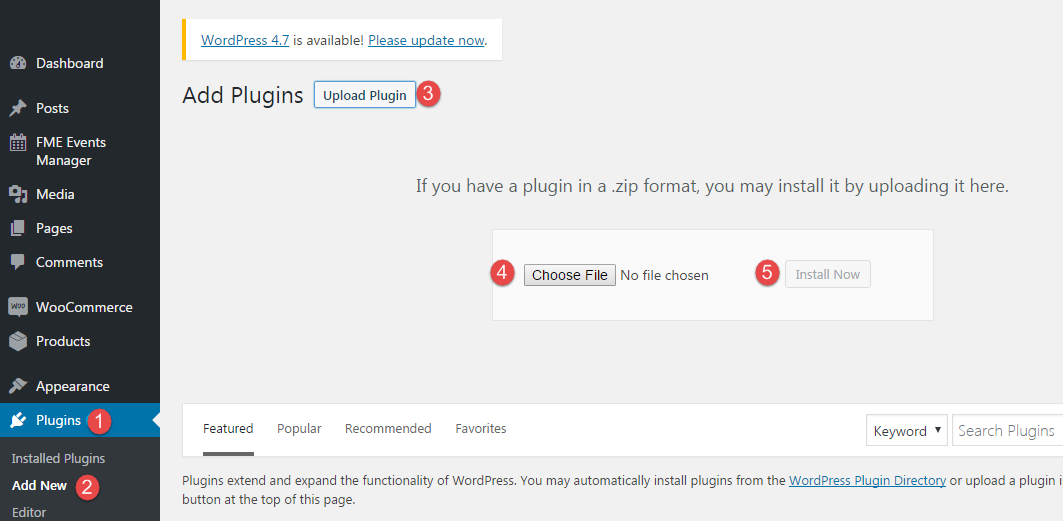
Step 1: Download the WooCommerce Events and Calendar addon and get it installed by adding the downloaded files in the plugins section.
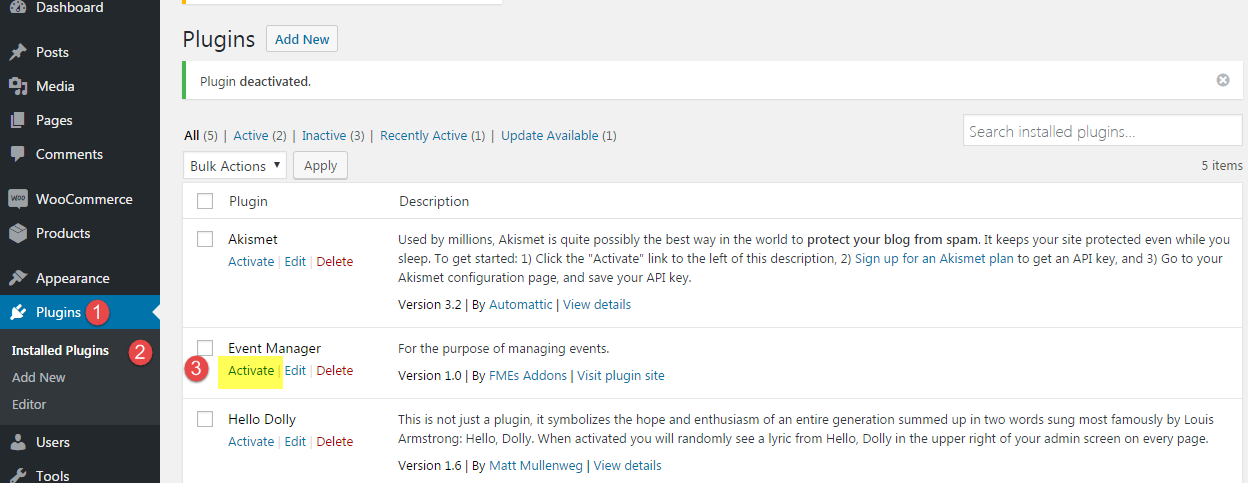
 Step 2: Click the “Installed Plugins” tab and navigate to the application you have just installed. Find it with the name of Events Manager. Click ‘Activate’ and the application will become a part of your eCommerce website.
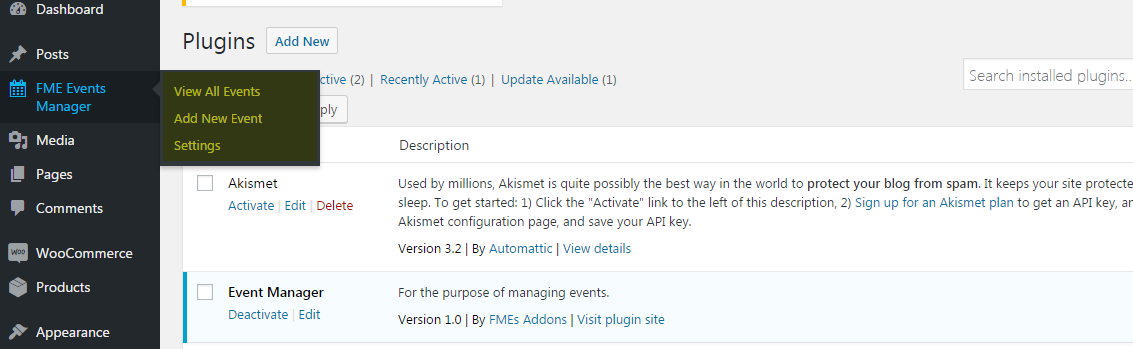
 Step 3: The activation of the plugin will add an “FME Events Manager” tab to your control panel. Point over the tab, and it will show customization options and settings. Click the tab and it will expand accordingly.
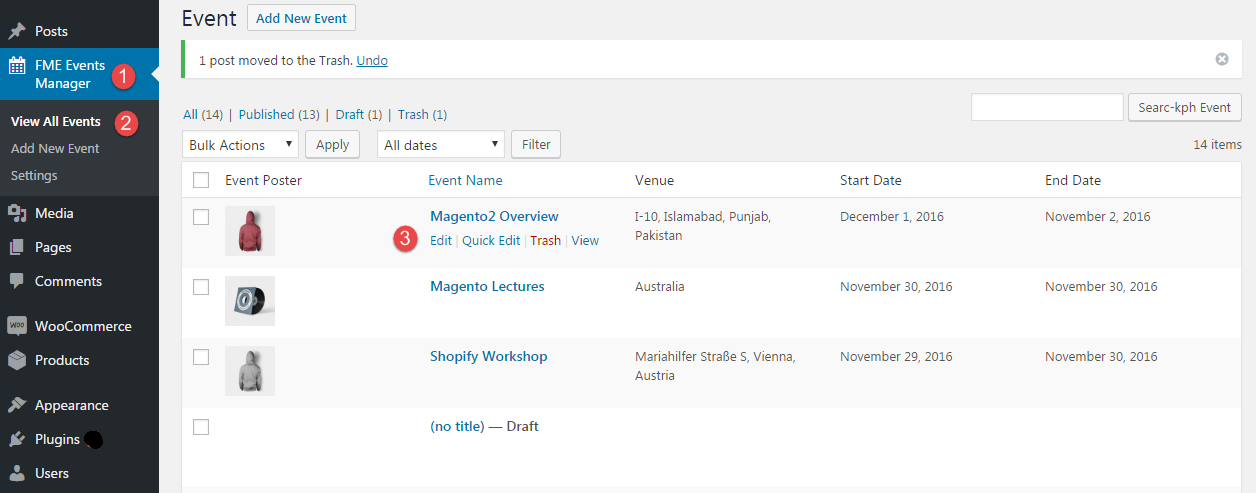
 Step 4: Click the tab, and select “View All Events.” It will allow you to view and manage all the events you create on your business website. You can edit, quick edit, view and delete an event at a click and focus on the rest of the listings. It also allows you to draft events, made countless changes and publish it later.
 Step 5: Click “Add New Event” below the FME Events Manager tab and start with creating an event on your WooCommerce website. It starts with writing a custom title, description and adding a venue of the event, and extends to the assigning products like tickets and its starting and ending dates. Attaching products is quite easy. All you need to do is select products from the drop-down menu, and it will be available for purchase on this specific event page.
Now, Navigate the address on Google map to get your users easily reach the event venue. You can add a name of the person to contact along with his/her phone and fax numbers.
Step 5: Click “Add New Event” below the FME Events Manager tab and start with creating an event on your WooCommerce website. It starts with writing a custom title, description and adding a venue of the event, and extends to the assigning products like tickets and its starting and ending dates. Attaching products is quite easy. All you need to do is select products from the drop-down menu, and it will be available for purchase on this specific event page.
Now, Navigate the address on Google map to get your users easily reach the event venue. You can add a name of the person to contact along with his/her phone and fax numbers.
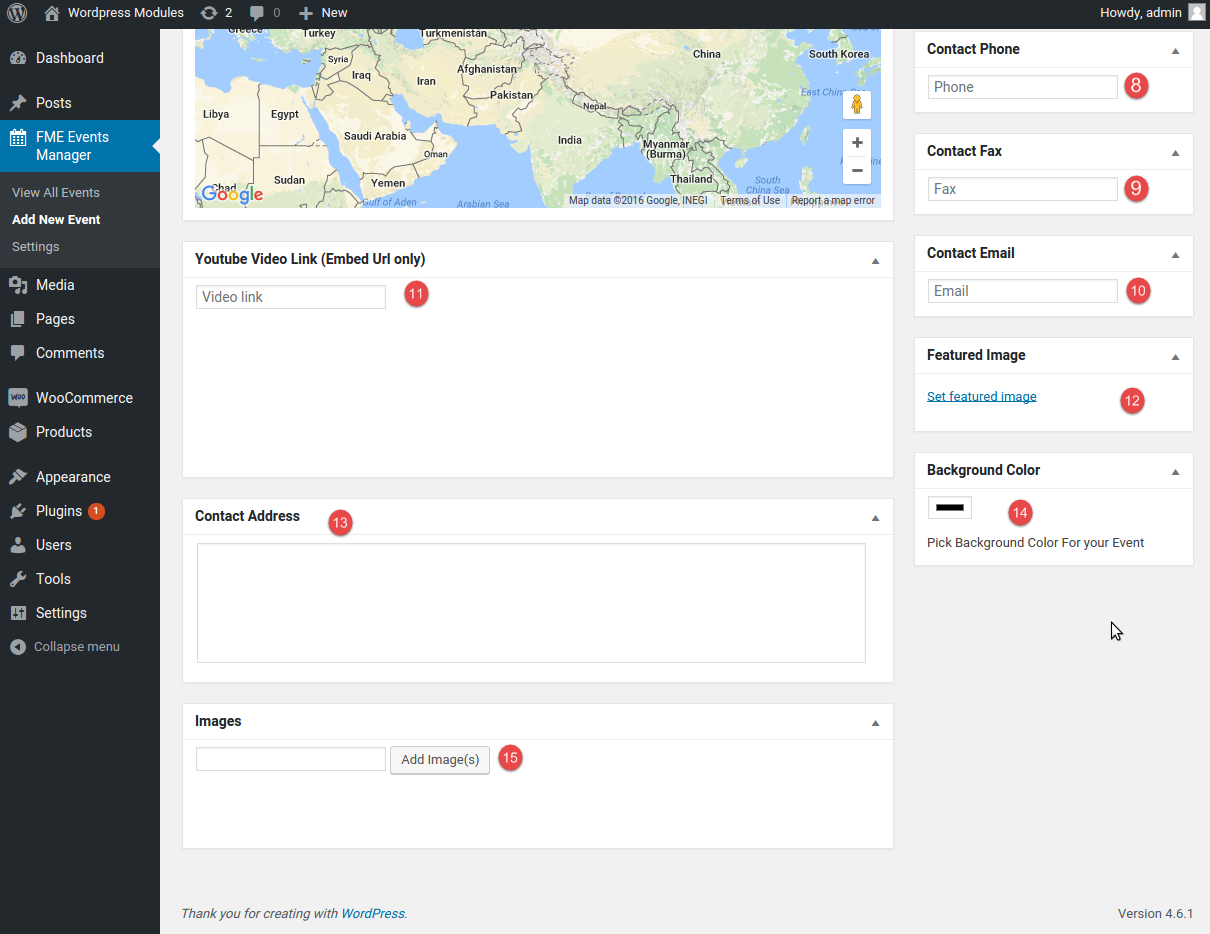
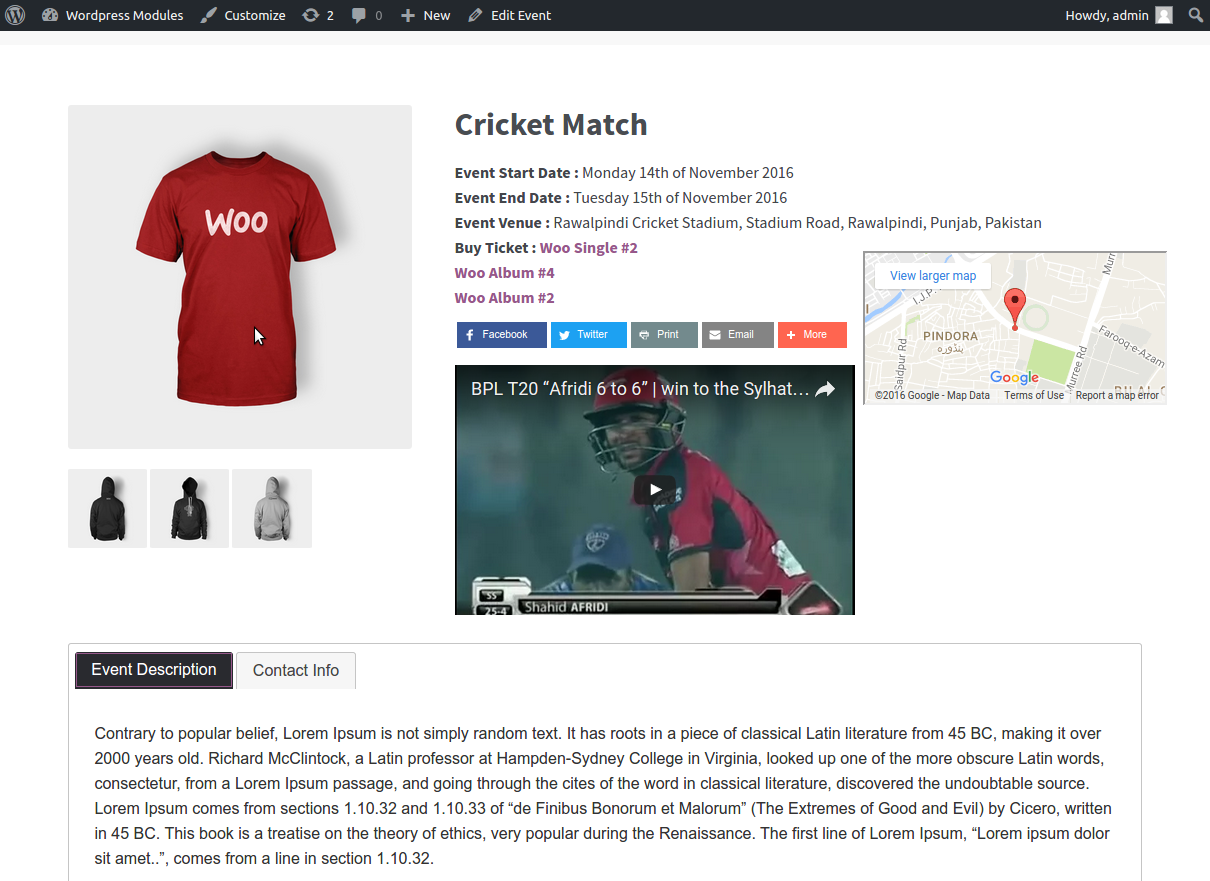
 Step 6: Proceed with the creation of event by scrolling down the page. You can embed a YouTube video to let the customers know more about the event. Add physical and email address of the contact person for further assistance of the users, whereas, you can beautify the events page with relevant snaps and features images. Once you are done with all the information, preview the new listing and get it published.
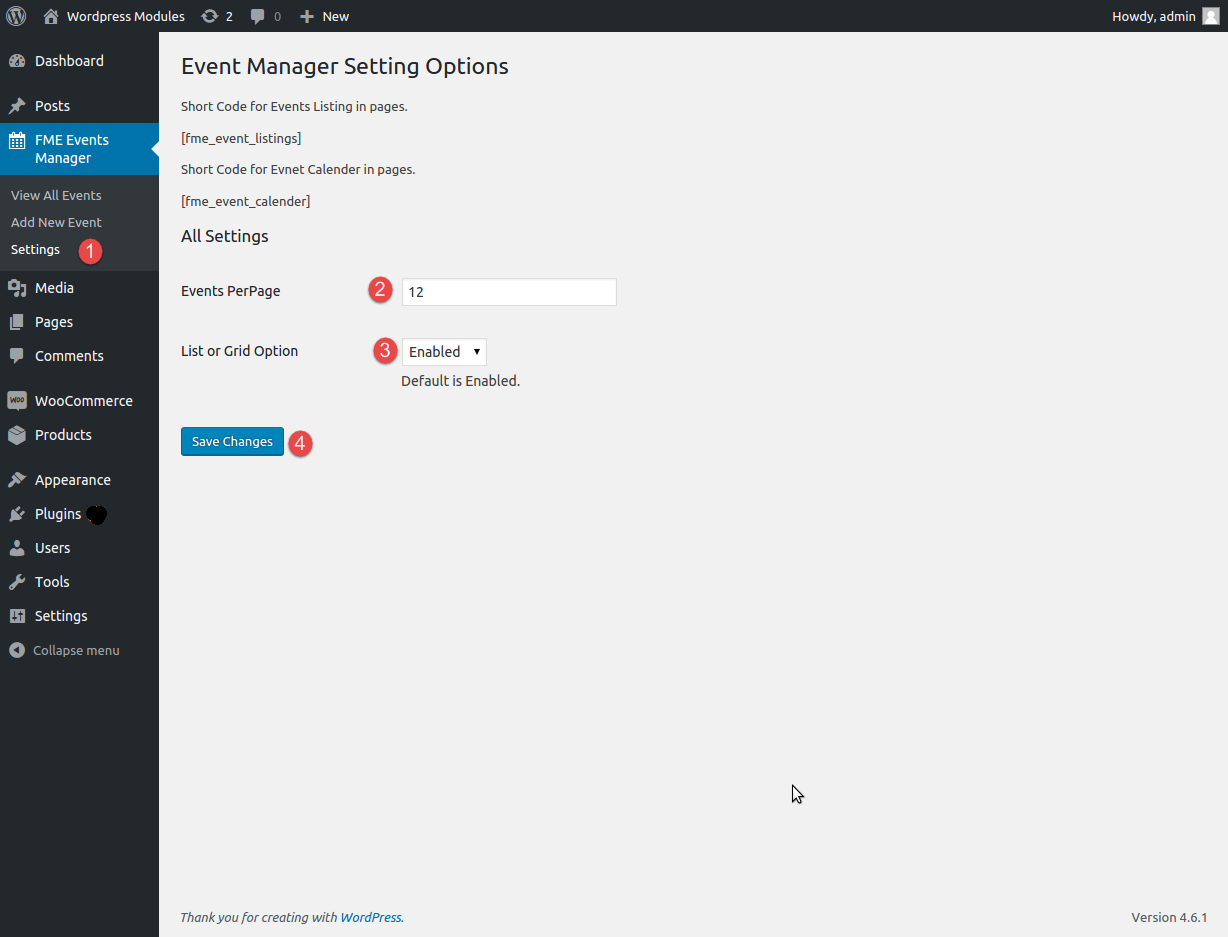
 Step 7: Congrats! You have completed most of the tasks for integrating events calendar into your WooCommerce and boosting sales of the tickets through event pages. Now, move to the settings tab and configure the display of events on the front end.
Select the number of events you want to display on each listings page and enable or disable users to view the events in a list or grid.
Step 7: Congrats! You have completed most of the tasks for integrating events calendar into your WooCommerce and boosting sales of the tickets through event pages. Now, move to the settings tab and configure the display of events on the front end.
Select the number of events you want to display on each listings page and enable or disable users to view the events in a list or grid.
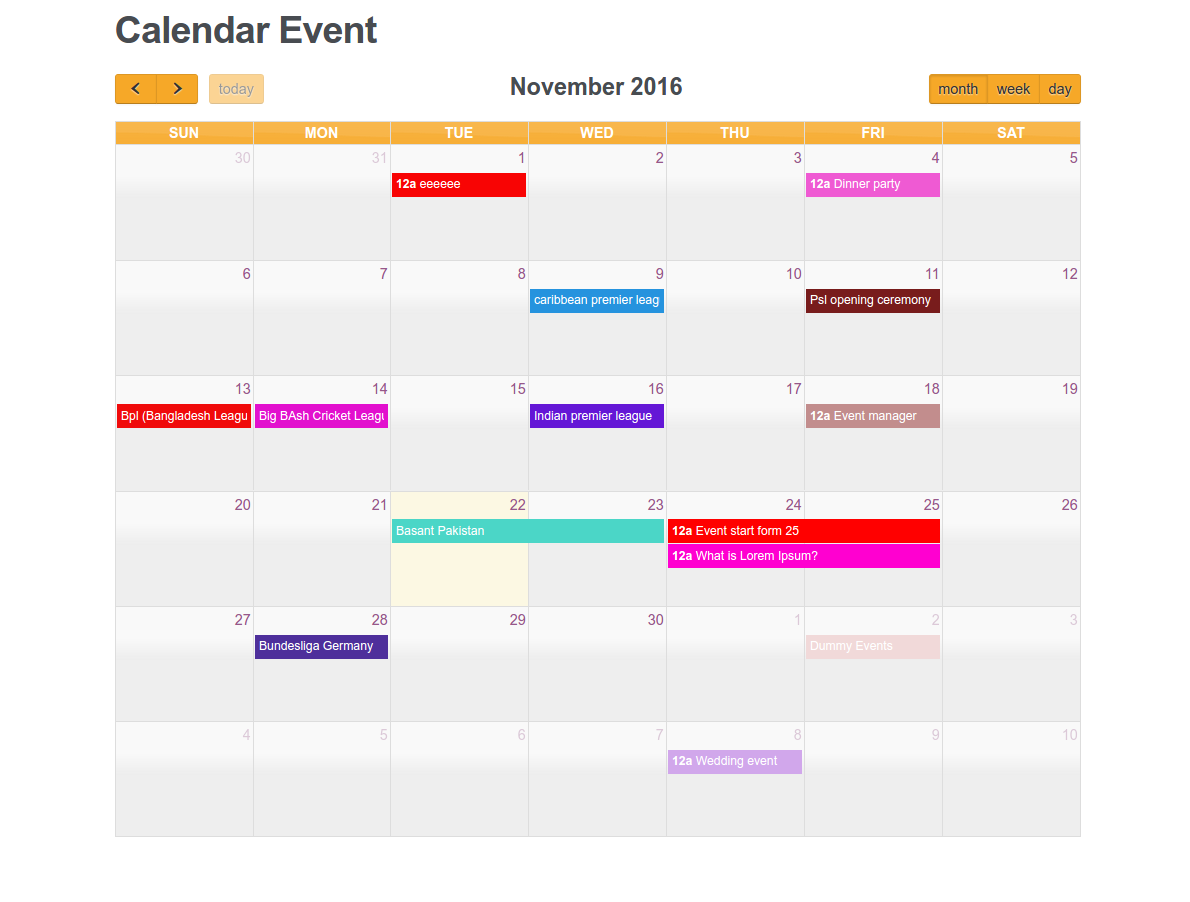
 Step 8: Once you finish configuring the settings, you can easily test the addition of plugin on the front end of your store. An additional tab will appear on the main menu saying ‘Events Calendar’ which will show all the events in a calendar view.
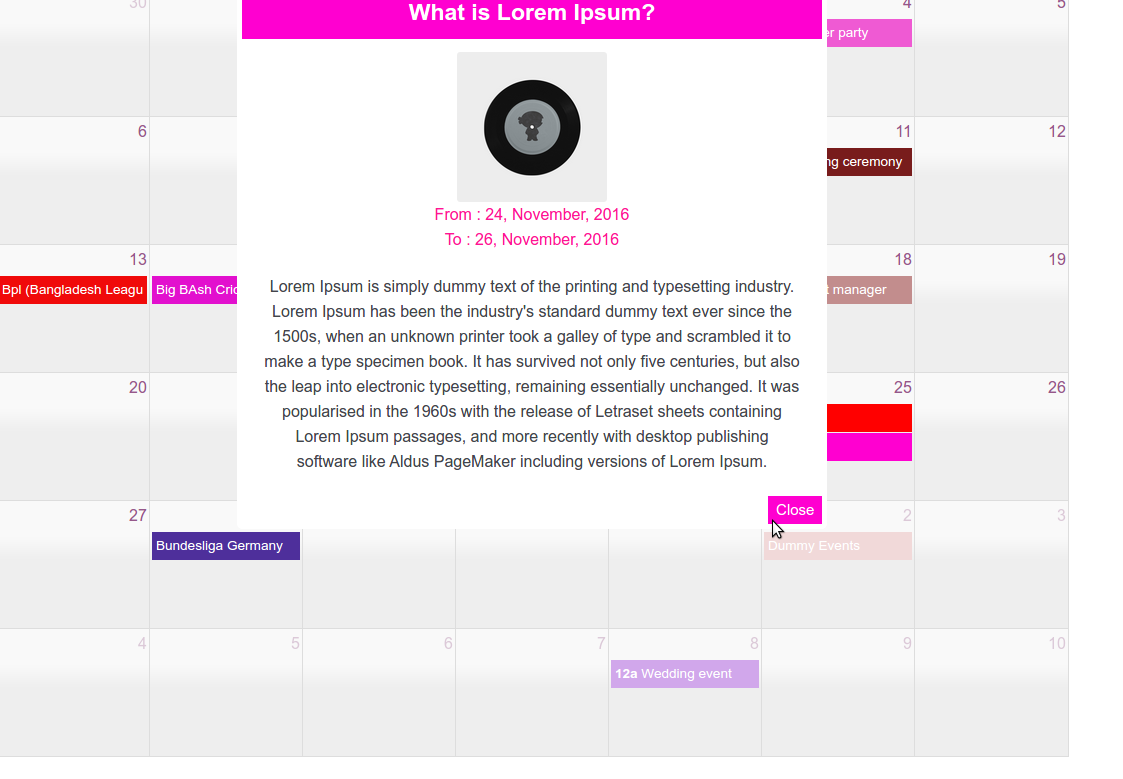
 Your potential customers can click on any event and the details will display in a popup window. It will set them free from visiting a dedicated event page.
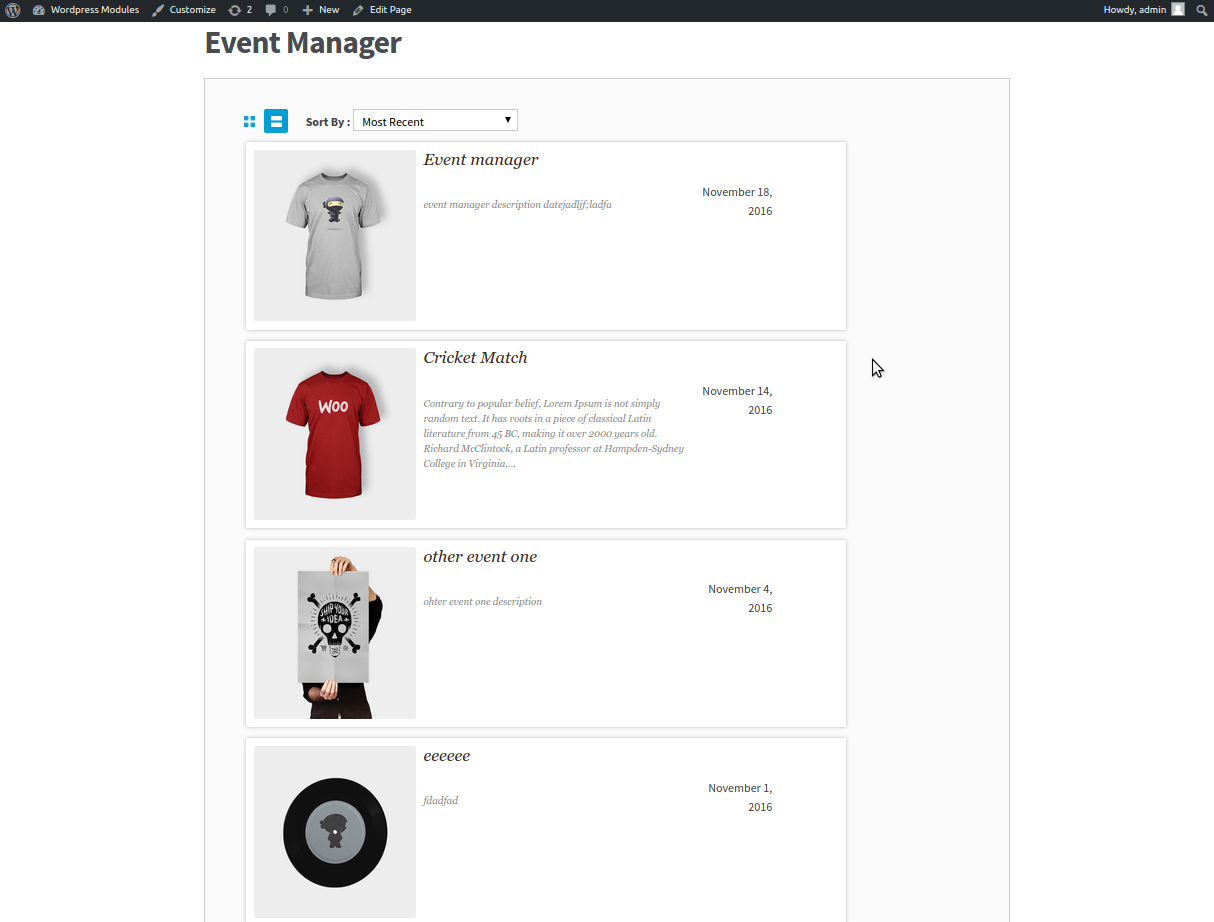
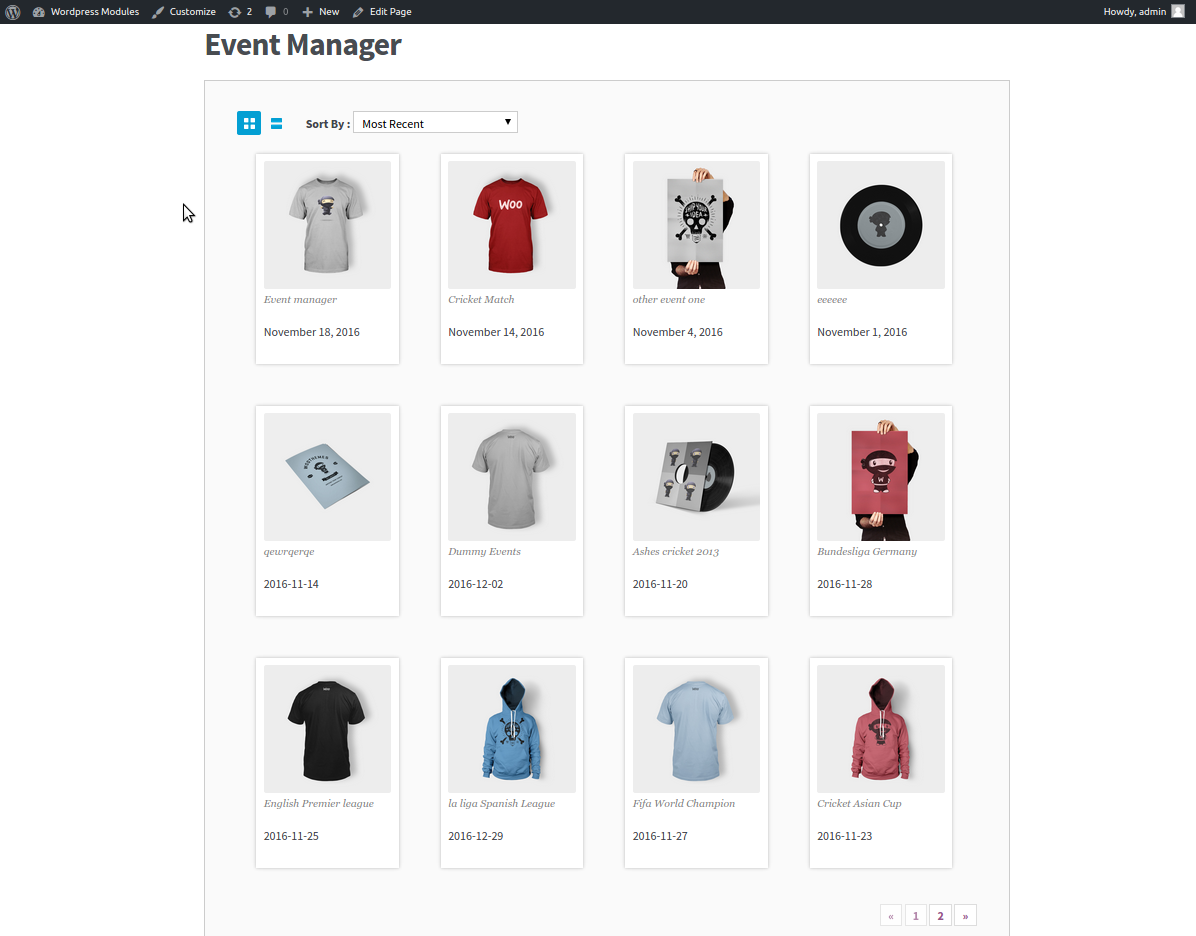
 Step 9: This plugin also displays all the events on a page. Users of your website can either view the listings in a list or a grid.
 Step 10: From the events listings page, users can click on any event and get the details on a separate page.
 Conclusion:
The above-illustrated steps are easy to follow in creating events and attaching products for increasing conversion and revenue. This can be one of your powerful strategies for enhancing user engagements, making them participate in amusing events and buying tickets for it. Holding recreational event will boost your business as most of the people would like to attend with their friends and family, which means higher sales and increasing revenue.
Conclusion:
The above-illustrated steps are easy to follow in creating events and attaching products for increasing conversion and revenue. This can be one of your powerful strategies for enhancing user engagements, making them participate in amusing events and buying tickets for it. Holding recreational event will boost your business as most of the people would like to attend with their friends and family, which means higher sales and increasing revenue.
Step 2: Click the “Installed Plugins” tab and navigate to the application you have just installed. Find it with the name of Events Manager. Click ‘Activate’ and the application will become a part of your eCommerce website.
Step 3: The activation of the plugin will add an “FME Events Manager” tab to your control panel. Point over the tab, and it will show customization options and settings. Click the tab and it will expand accordingly.
Step 4: Click the tab, and select “View All Events.” It will allow you to view and manage all the events you create on your business website. You can edit, quick edit, view and delete an event at a click and focus on the rest of the listings. It also allows you to draft events, made countless changes and publish it later.
Step 5: Click “Add New Event” below the FME Events Manager tab and start with creating an event on your WooCommerce website. It starts with writing a custom title, description and adding a venue of the event, and extends to the assigning products like tickets and its starting and ending dates. Attaching products is quite easy. All you need to do is select products from the drop-down menu, and it will be available for purchase on this specific event page.
Now, Navigate the address on Google map to get your users easily reach the event venue. You can add a name of the person to contact along with his/her phone and fax numbers.
Step 6: Proceed with the creation of event by scrolling down the page. You can embed a YouTube video to let the customers know more about the event. Add physical and email address of the contact person for further assistance of the users, whereas, you can beautify the events page with relevant snaps and features images. Once you are done with all the information, preview the new listing and get it published.
Step 7: Congrats! You have completed most of the tasks for integrating events calendar into your WooCommerce and boosting sales of the tickets through event pages. Now, move to the settings tab and configure the display of events on the front end.
Select the number of events you want to display on each listings page and enable or disable users to view the events in a list or grid.
Step 8: Once you finish configuring the settings, you can easily test the addition of plugin on the front end of your store. An additional tab will appear on the main menu saying ‘Events Calendar’ which will show all the events in a calendar view.
Your potential customers can click on any event and the details will display in a popup window. It will set them free from visiting a dedicated event page.
Step 9: This plugin also displays all the events on a page. Users of your website can either view the listings in a list or a grid.
Step 10: From the events listings page, users can click on any event and get the details on a separate page.
Conclusion:
The above-illustrated steps are easy to follow in creating events and attaching products for increasing conversion and revenue. This can be one of your powerful strategies for enhancing user engagements, making them participate in amusing events and buying tickets for it. Holding recreational event will boost your business as most of the people would like to attend with their friends and family, which means higher sales and increasing revenue.