- $USD
- English (United States)
- Hire an Expert
- Get Support

Online business is all about understanding the dire needs of customers and addressing it with product customization. A traditional product page consists a few options which are not sufficient for a customer to document the changes they need in the end product, which creates a communication barrier. For such a problem, additional fields are created to help them personalize products and record their preferences with easy selection of options. The addition of custom options also depends on the nature of the products or services a merchant offer. For example, a baby garments shop may need to include options like age (in month or years), size (for healthy and smart kids), color and other attributes. Such fields allow parents to quickly mark a favorite color or select a size from the available options and proceed to checkout. The absence of such a facility requires them to call and briefly explain a product they need for their baby. If you are also facing such problems in meeting customers’ requirements, we recommend you the installation of Product Custom Options extension that offers a variety of field types to make the product page more elaborate. Following is a detailed guide for adding custom options to products in your WooCommerce store.
Step 1: Download Product addons for WooCommerce from FMEAddons
Step 2: Install the application. Navigate to Plugins section and upload the one you have just purchased. Choose the files and complete the installation process. 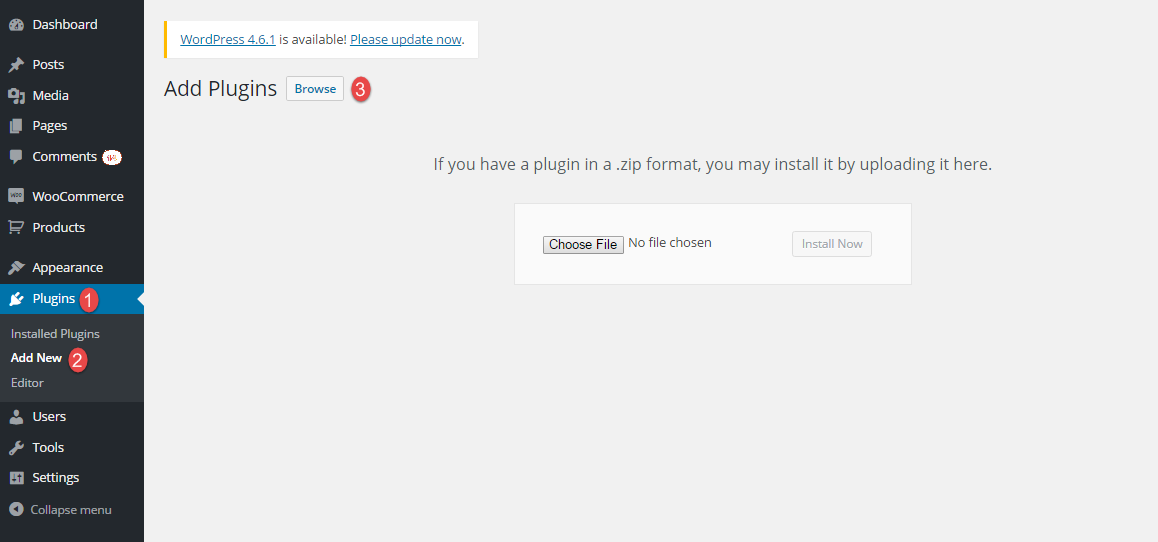 Step 3: Activate the extension by moving to the installed plugins section.
 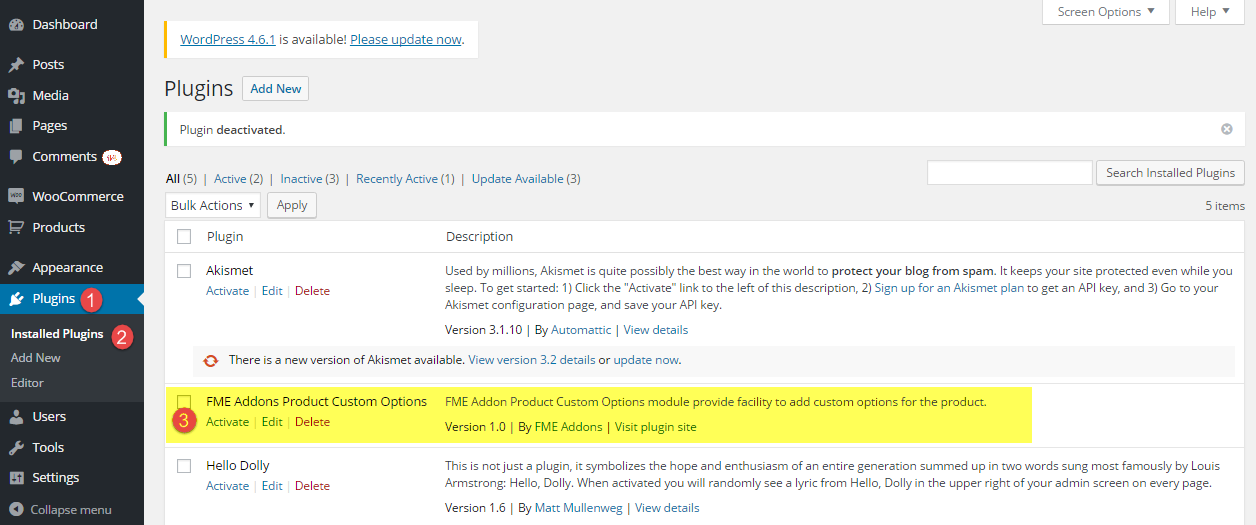 Step 4: After activation, you will find an additional tab labeled as Product Custom Options under the Products menu. Click it and you will reach the menu to create additional options. Click ‘Add New Option’ to have a new type of field for a product.
 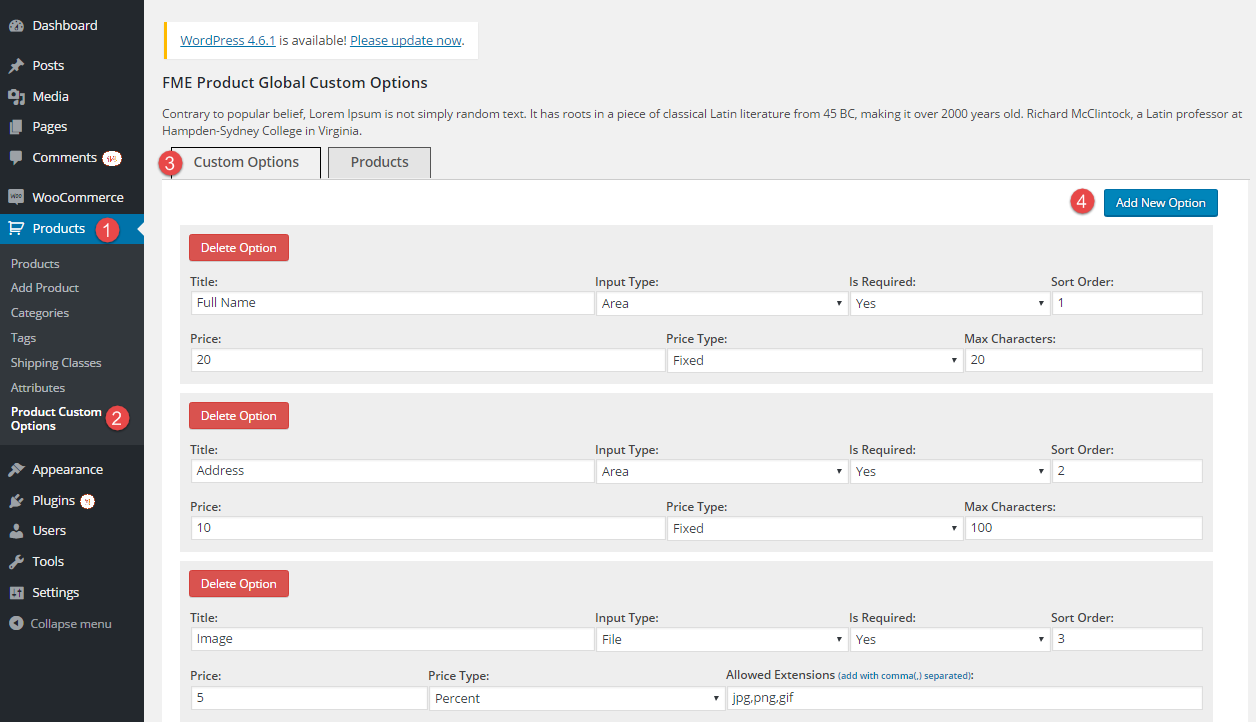 Step 5: Create a new option and specify the input type. This extension supports 9 different kinds of input fields. You can select the one that suits the products you offer. For example, select drop-down if allowing customers to select a color from the list.
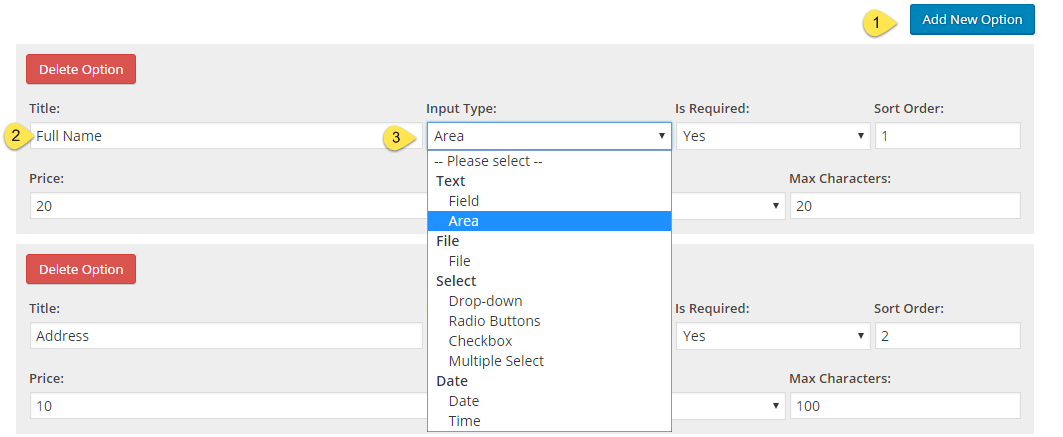
Step 6: While staying on the same page, click Products to apply the additional options to specific products. You can either search for a product or select from the available list. 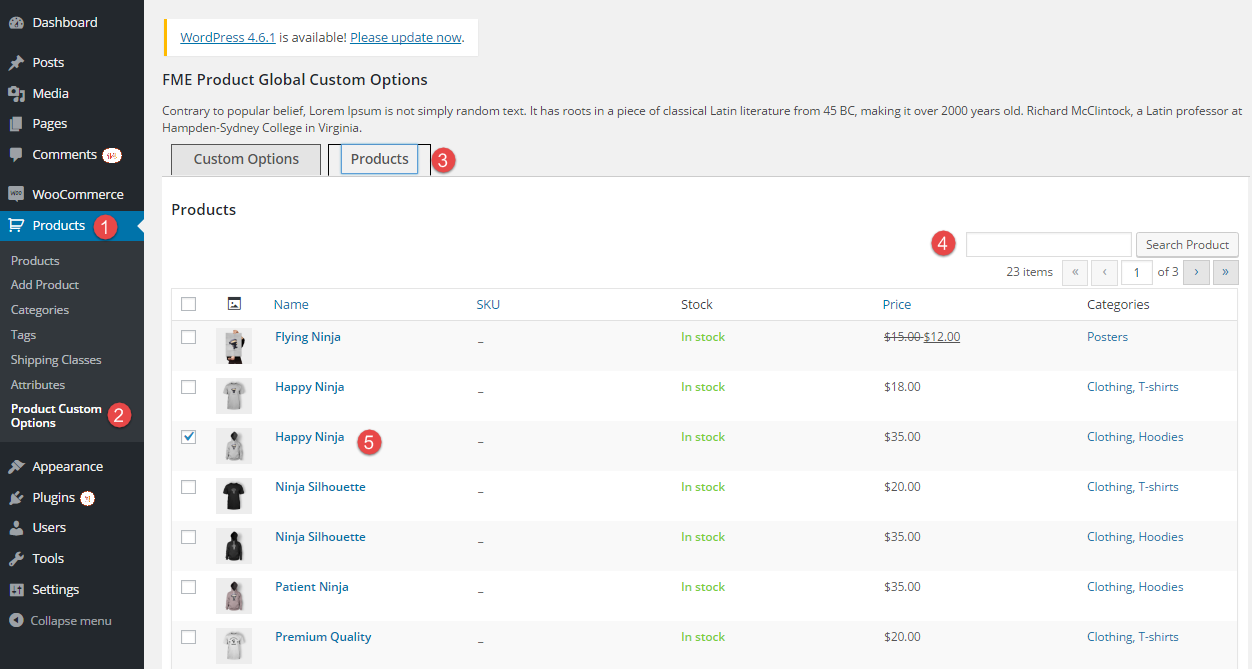 Step 7: This plugin allows you to create multiple options for a product or assign these options to more than one store item. This saves your time in assigning options to products that have common features or attributes.
Step 8: The additional options appear on the product page for the ease of end consumers in this way so that they can quickly express their choices. They can get the product as they like them. 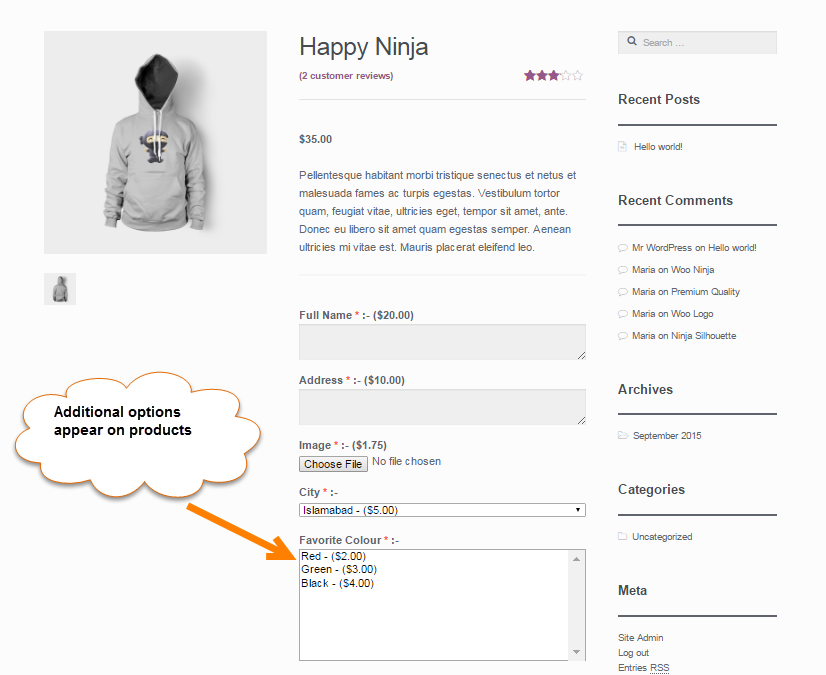
Step 9: In the same way, the selection of options is displayed on the cart pages. 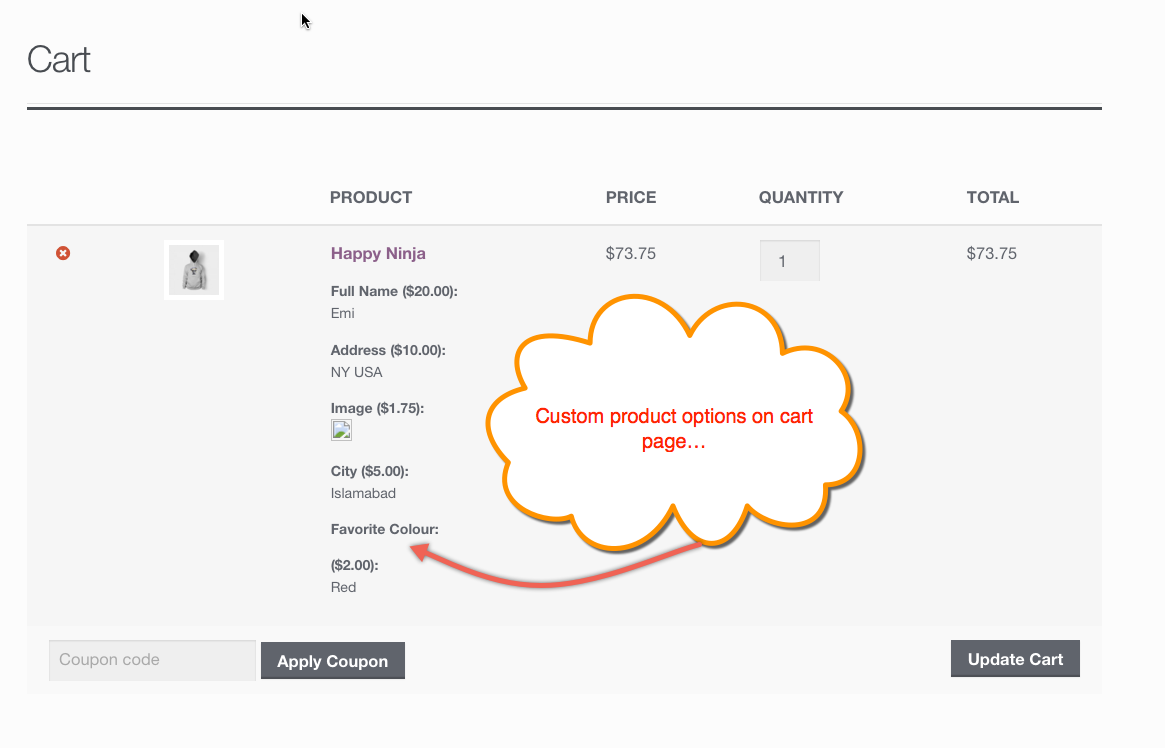 Step 10: Customers can view the preferences they have opted for a product even on the billing page of their orders. This plugin consistently shows the details so that the customers can edit them before placing an order.
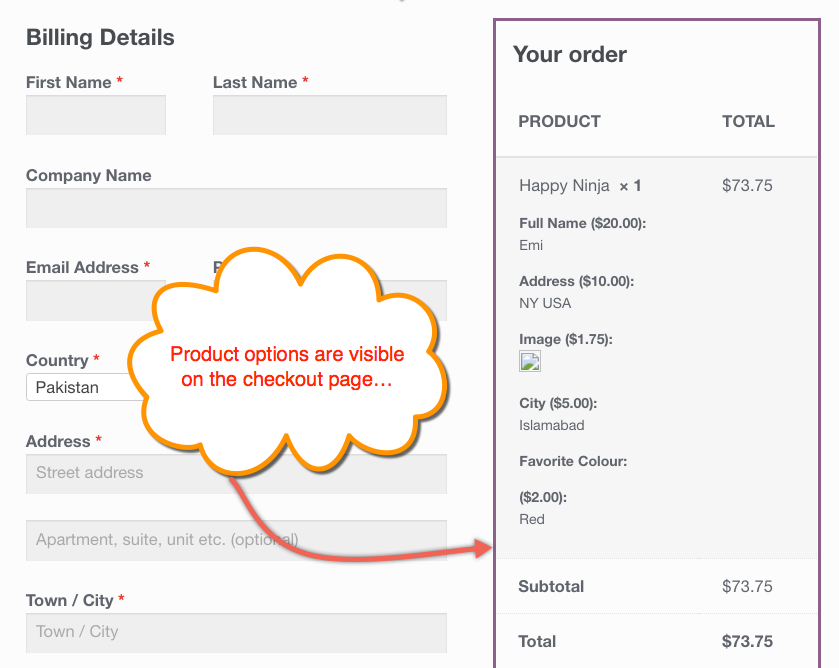
These options are also visible on order details page. 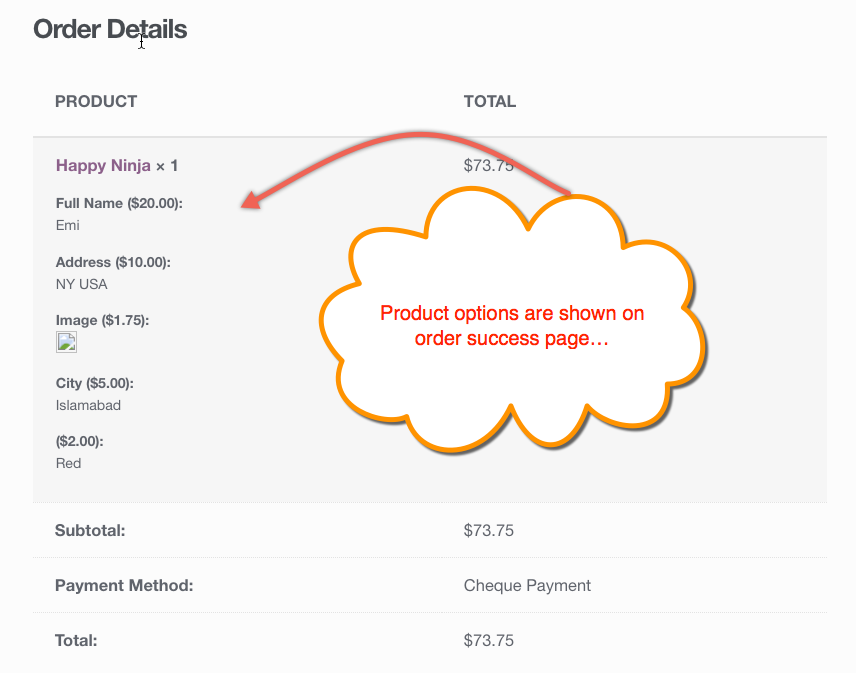
Step 11: Once the customers complete their orders, they are communicated about their product preferences on the order Thank You page. 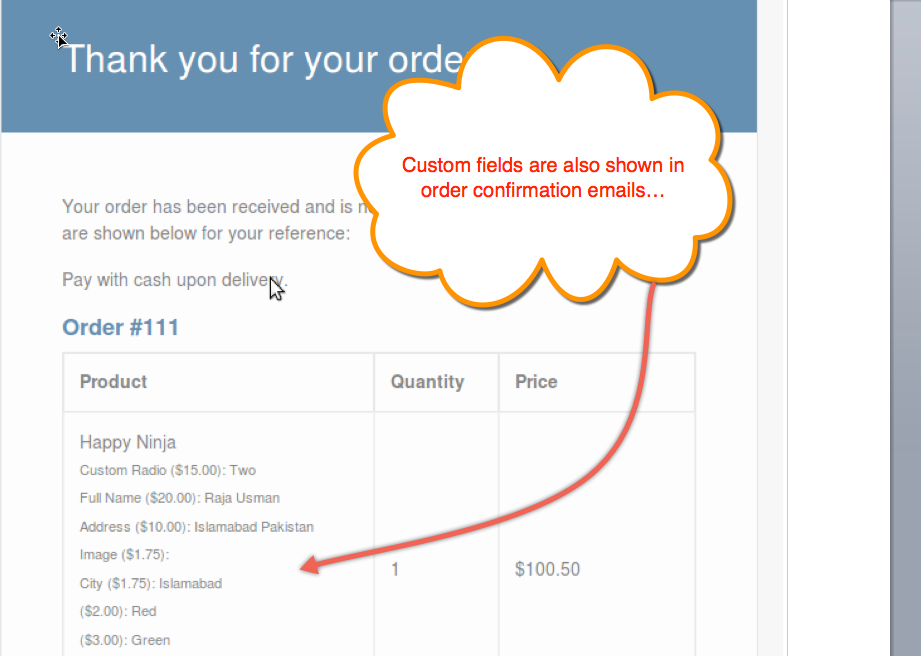
Step 12: The store administrators can also view the custom options in the orders section to check what fields are selected by a customer. 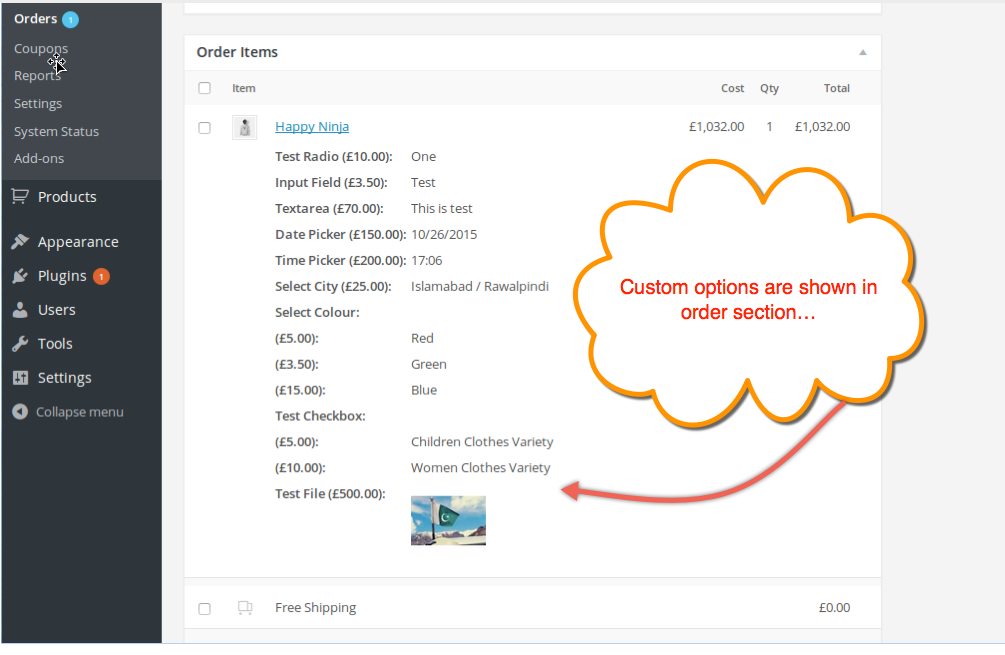
Step 13: The display of customer options on products and different checkout pages proves that you have successfully added custom fields to grab more product relevant information from your valuable customers. Scan the information, meet the customer needs and achieve their ultimate satisfaction.
Conclusion:
The key to success in online business is to understand exactly what a customer is looking for. The strategy to add custom options to products may seem to be of a trivial concern, but it plays a major role in engaging users by allowing them to select options and customize the end product. The Custom Product Options plugin is one of the most suggested tools for adding options of your choice with a few simple steps. We hope the above tutorial will help you to start without pursuing coding expertise.